Here are some pictures of the finished piece, so that all who enter here are not lost!!


Tim Holtz Sizzix Bigz pocket watch die.
Tim Holtz Sizzix Movers and Shapers circles dies.
Taylored expressions quatrefoil cutting plate die.
Lifestyle crafts circle dies.
Grunge board.
Grunge paper.
Card (this was an electric blue metallic) and gold.
Ranger distressed paints, salty ocean, chipped sapphire.
Crop a dile hole punch.
Tim Holtz Alteration hinges.
Glues, Collall universal, Art glitter glue, and Zyron machine with permanent adhesive refill.
Die cutting machine (which cuts both thick and thin dies).
1. Cut eight grunge board pocket watch frames.Using the pocket watch die with the largest of the Sizzix circle dies in the centre to create watch frames.
2. Using the same dies cut four watch frames in blue card.
3. Then cut eight circles of grunge paper using the life style craft dies. gradually increasing in size from the sixth smallest die to the fourteenth. You need to do this twice.
Repeat step three, using the blue card.

4. Next cut holes in each of five largest circles, again using the life style craft circle dies. If you cut the largest circles centre use die number nine. (counting from the centre of the 21 circles in the die set.) This will leave a frame with an edge of around 12mm. Do this to the four remaining circles and then repeat for the other half of the pocket watch.
5. Glue the blue card circles and the grunge paper together. After they are dry I used chipped sapphire distressed paint to colour all the edges, and sealed the grunge sides of the circles with salty ocean as at this point I wasn't sure what I wanted to do with the insides yet.

6. Mark where you want the hinges to go. I glued the metal brads once threaded through the hinge for the back of the watch between two of the grunge board watch frames, as this part of the hinge will lie flat against the side of the closed pocket watch.

7. Once the glue has dried glue one of the the remaining grunge board pocket watch frames to the inside face of the grunge board with the attached hinge. When this is dry, glue the inner blue card pocket watch frame to the grunge board. This leaves one blue watch frame and one grunge board frame stick these together but do not attach to the piece with the hinge yet.
8. Now on to the front half of the watch.This time glue the blue pocket watch frame to one of the grunge board frames and allow to dry. Then line up the piece with the hinge already in place, mark and punch the holes for the front of the hinge.
9. Then glue together the reducing eight circles making sure each layer is dry so that they don't slip and then glue to the last front. You should still be able to see the holes punched for the hinge.
Do this again for the back of the watch.

10. Before attaching the hinge to the front I started to decorate as the hinge would fit over the top.
Here I used gold card, and the taylored expressions die quatrefoil. It cuts great!
This was stuck on with a dry adhesive using a Zyron. I put the whole die cut through then placed the sticky side over each pocket watch back and front and then trimmed the edges.


11. Once all is dry glue the above to the front and the back part of the watch with the attached hinge.
12 Attach the front hinge and your ready to decorate. Thank goodness I hear you saying!
How to decorate. Any way you want too! Here's what I did.
Items used other than already mentioned :-
Watercolour paper.
Tim Holtz mirrored foil.
Ink blending tool.
Alcohol inks, meadow, eggplant, pool, stream and blending solution.
Dies, Memory box delicate web, small spiders, mini clouds, weathered fence, Cheery Lynn tiny things with wings, Mini fanciful flourish. Spellbinders, basic lattice and fancy lattice.
Pro markers. Pale blue, red, three shades of green and dark brown.
Memento brown dye ink.
Leaf stamps from Impression Obsession.
Black cotton thread.
Moulding mat and ball tool.
Gold distressed paint.
Navy Ribbon, 5mm
Black ultra fine glitter. (for spiders legs).

The picture above is what you should now have, well I decided at this point that I wanted a smooth lining, so I stuck some of Tim Holtz mirrored sticky backed foil to water colour card and then created a rough land scape using alcohol inks.
Then cut out two circles slightly larger than each opening on the above pocket watch.


Next put a small amount of glue inside the watch faces and gently centre and push each circle into their respective places, don't worry about any creases as you can flatten them later and those that are left will form part of the land scape.
All that's left to do is cut out all your die cuts, the only one I used anything other than pro markers was the weathered fence which I coloured using distressed gold paint, once dry I used a brown pro marker to highlight the wood texture of the die. I added various gems to the the web, leaves and insects.
Also after the glue had dried on the lady bird, I twisted some black cotton thread together and glued six strips on the underside and once dry trimmed to length. I then rolled both the spider and the lady bird on their backs and placed them on a moulding mat (a bit of firm flat sponge like mouse mat may do), and rubbed in circular movements with a 5mm ball stylus this makes both insects 3D and because of the depth of the watch you can still close the watch. This was also done to the leaves after they had been decorated.
All elemants were then glued into place.
I found the magnetic clasp a bit strong so I put some gems around each and although this keeps the clasp apart its still strong.

.
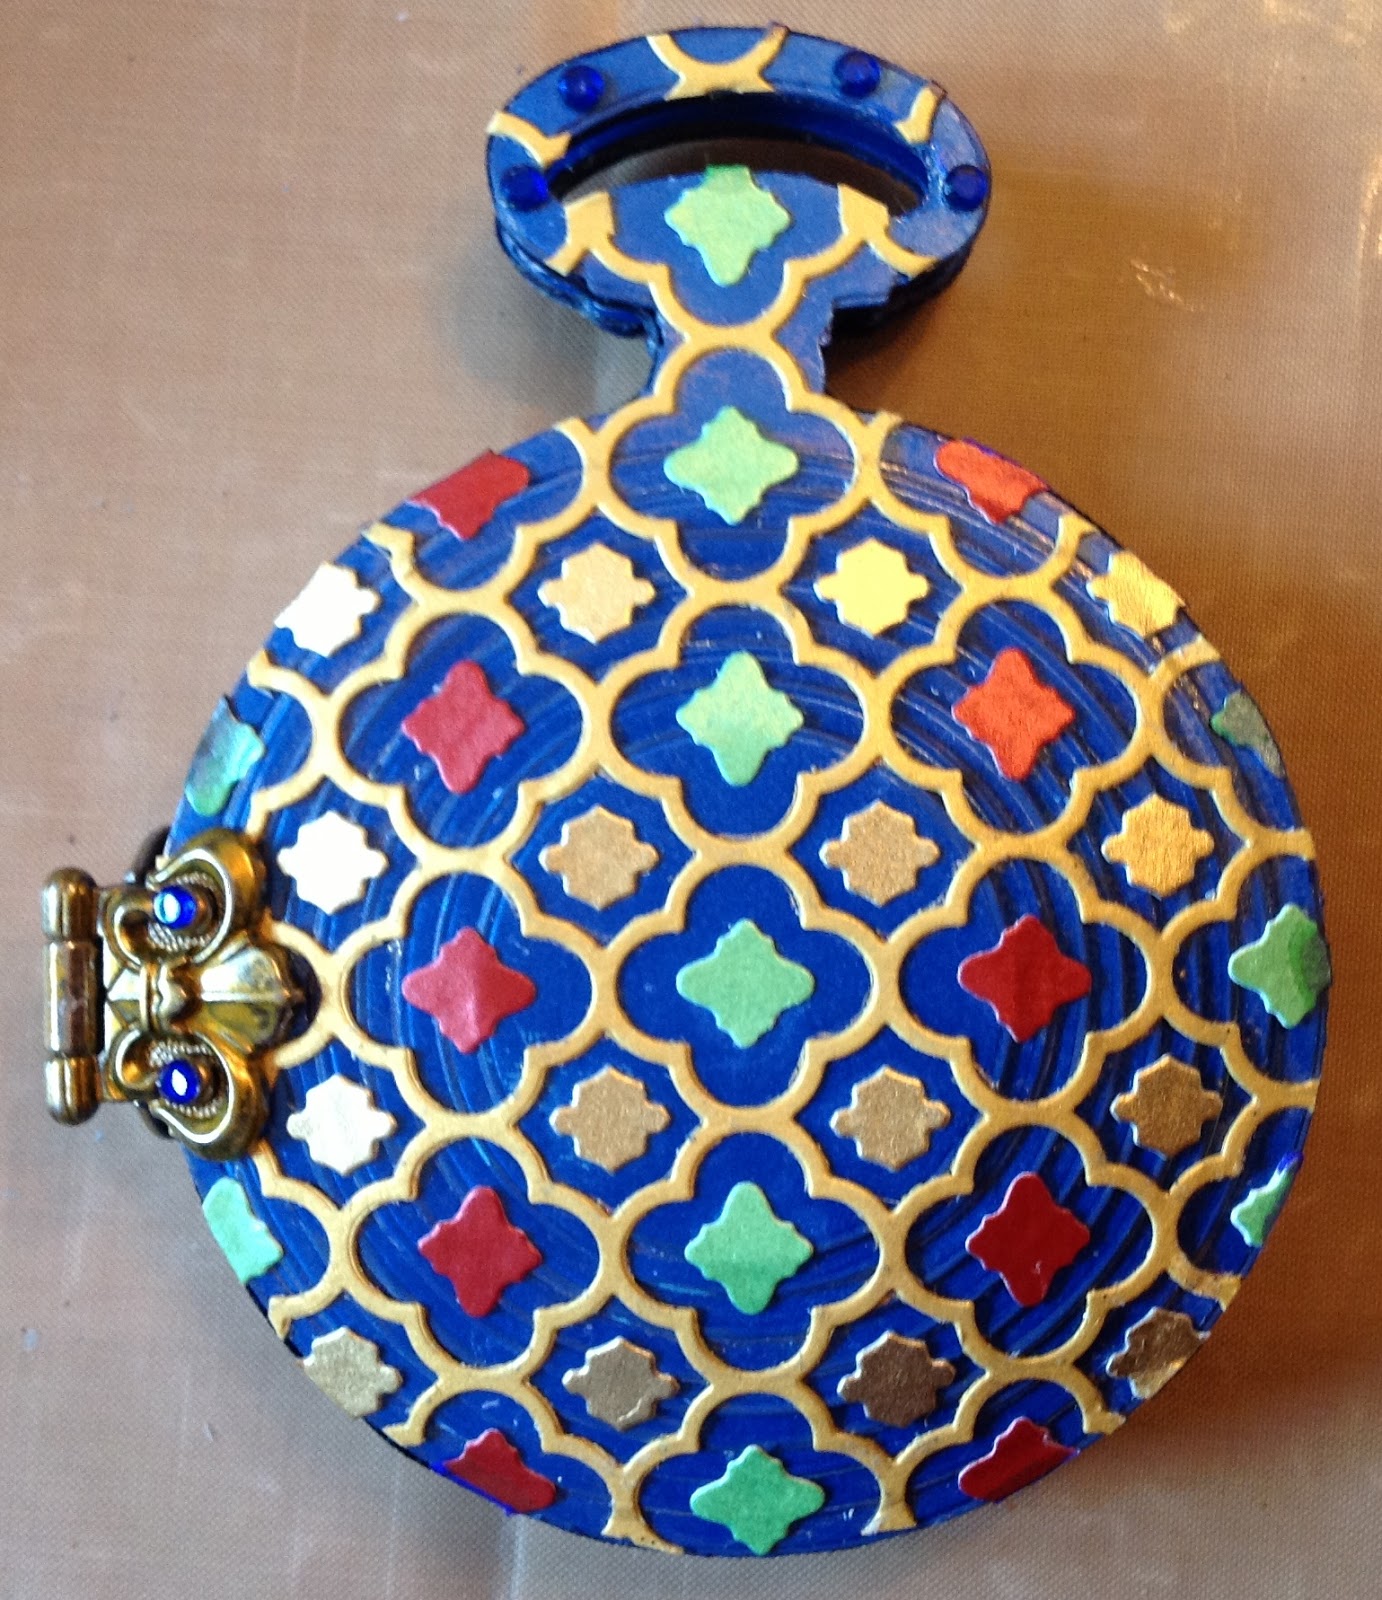
Next comes the decoration on the outside. I decided to use the small bits that many throw away when they are die cutting. The waste bits are from Spellbinders dies basic lattice and fancy lattice.


As you can see I added a few gems to both the hinges and the bale on the front of the pocket watch, although I was tempted to go mad! maybe on another!
Lastly I glued the navy ribbon round the edge of each side of the pocket watch.
I hope this made some sort of sense and was not too long, any way please leave any comments at the bottom even if you need to scroll down. Many thanks for reading the above I hope you like what I have done.
No comments:
Post a Comment